An overview of my Python port scanner built with the socket module, showcasing my learning in network programming and debugging. The project demonstrates scanning common and full port ranges with real-time results, emphasizes ethical use, and includes clear usage instructions. It highlights my practical skills in Python, cybersecurity fundamentals with a focus on ethical hacking.
Project Overview
A lightweight Python-based port scanner built with the socket module. This project was developed to strengthen my understanding of network programming fundamentals and demonstrate practical use of sockets in Python. You find the repository here
What I Used
Python for development.
Socket module for network communication
VS Code & Git for coding and version control
ChatGPT for idea validation and debugging support
Key Challenges
One of the main issues encountered was a timeout error caused by using timeout(0.5) instead of the correct settimeout(0.5). Debugging this reinforced my knowledge of Python’s socket API and error handling.
Outcome
Successfully built a Python socket-based port scanner capable of:
Scanning the most commonly used network ports.
Scanning a full range of ports (1–1024).
Providing real-time results on whether each port is OPEN or CLOSED.
I always emphasize ethical use: only scan devices you own or have explicit permission to test.
Usage Instructions
The port scanner follows a simple, interactive workflow:
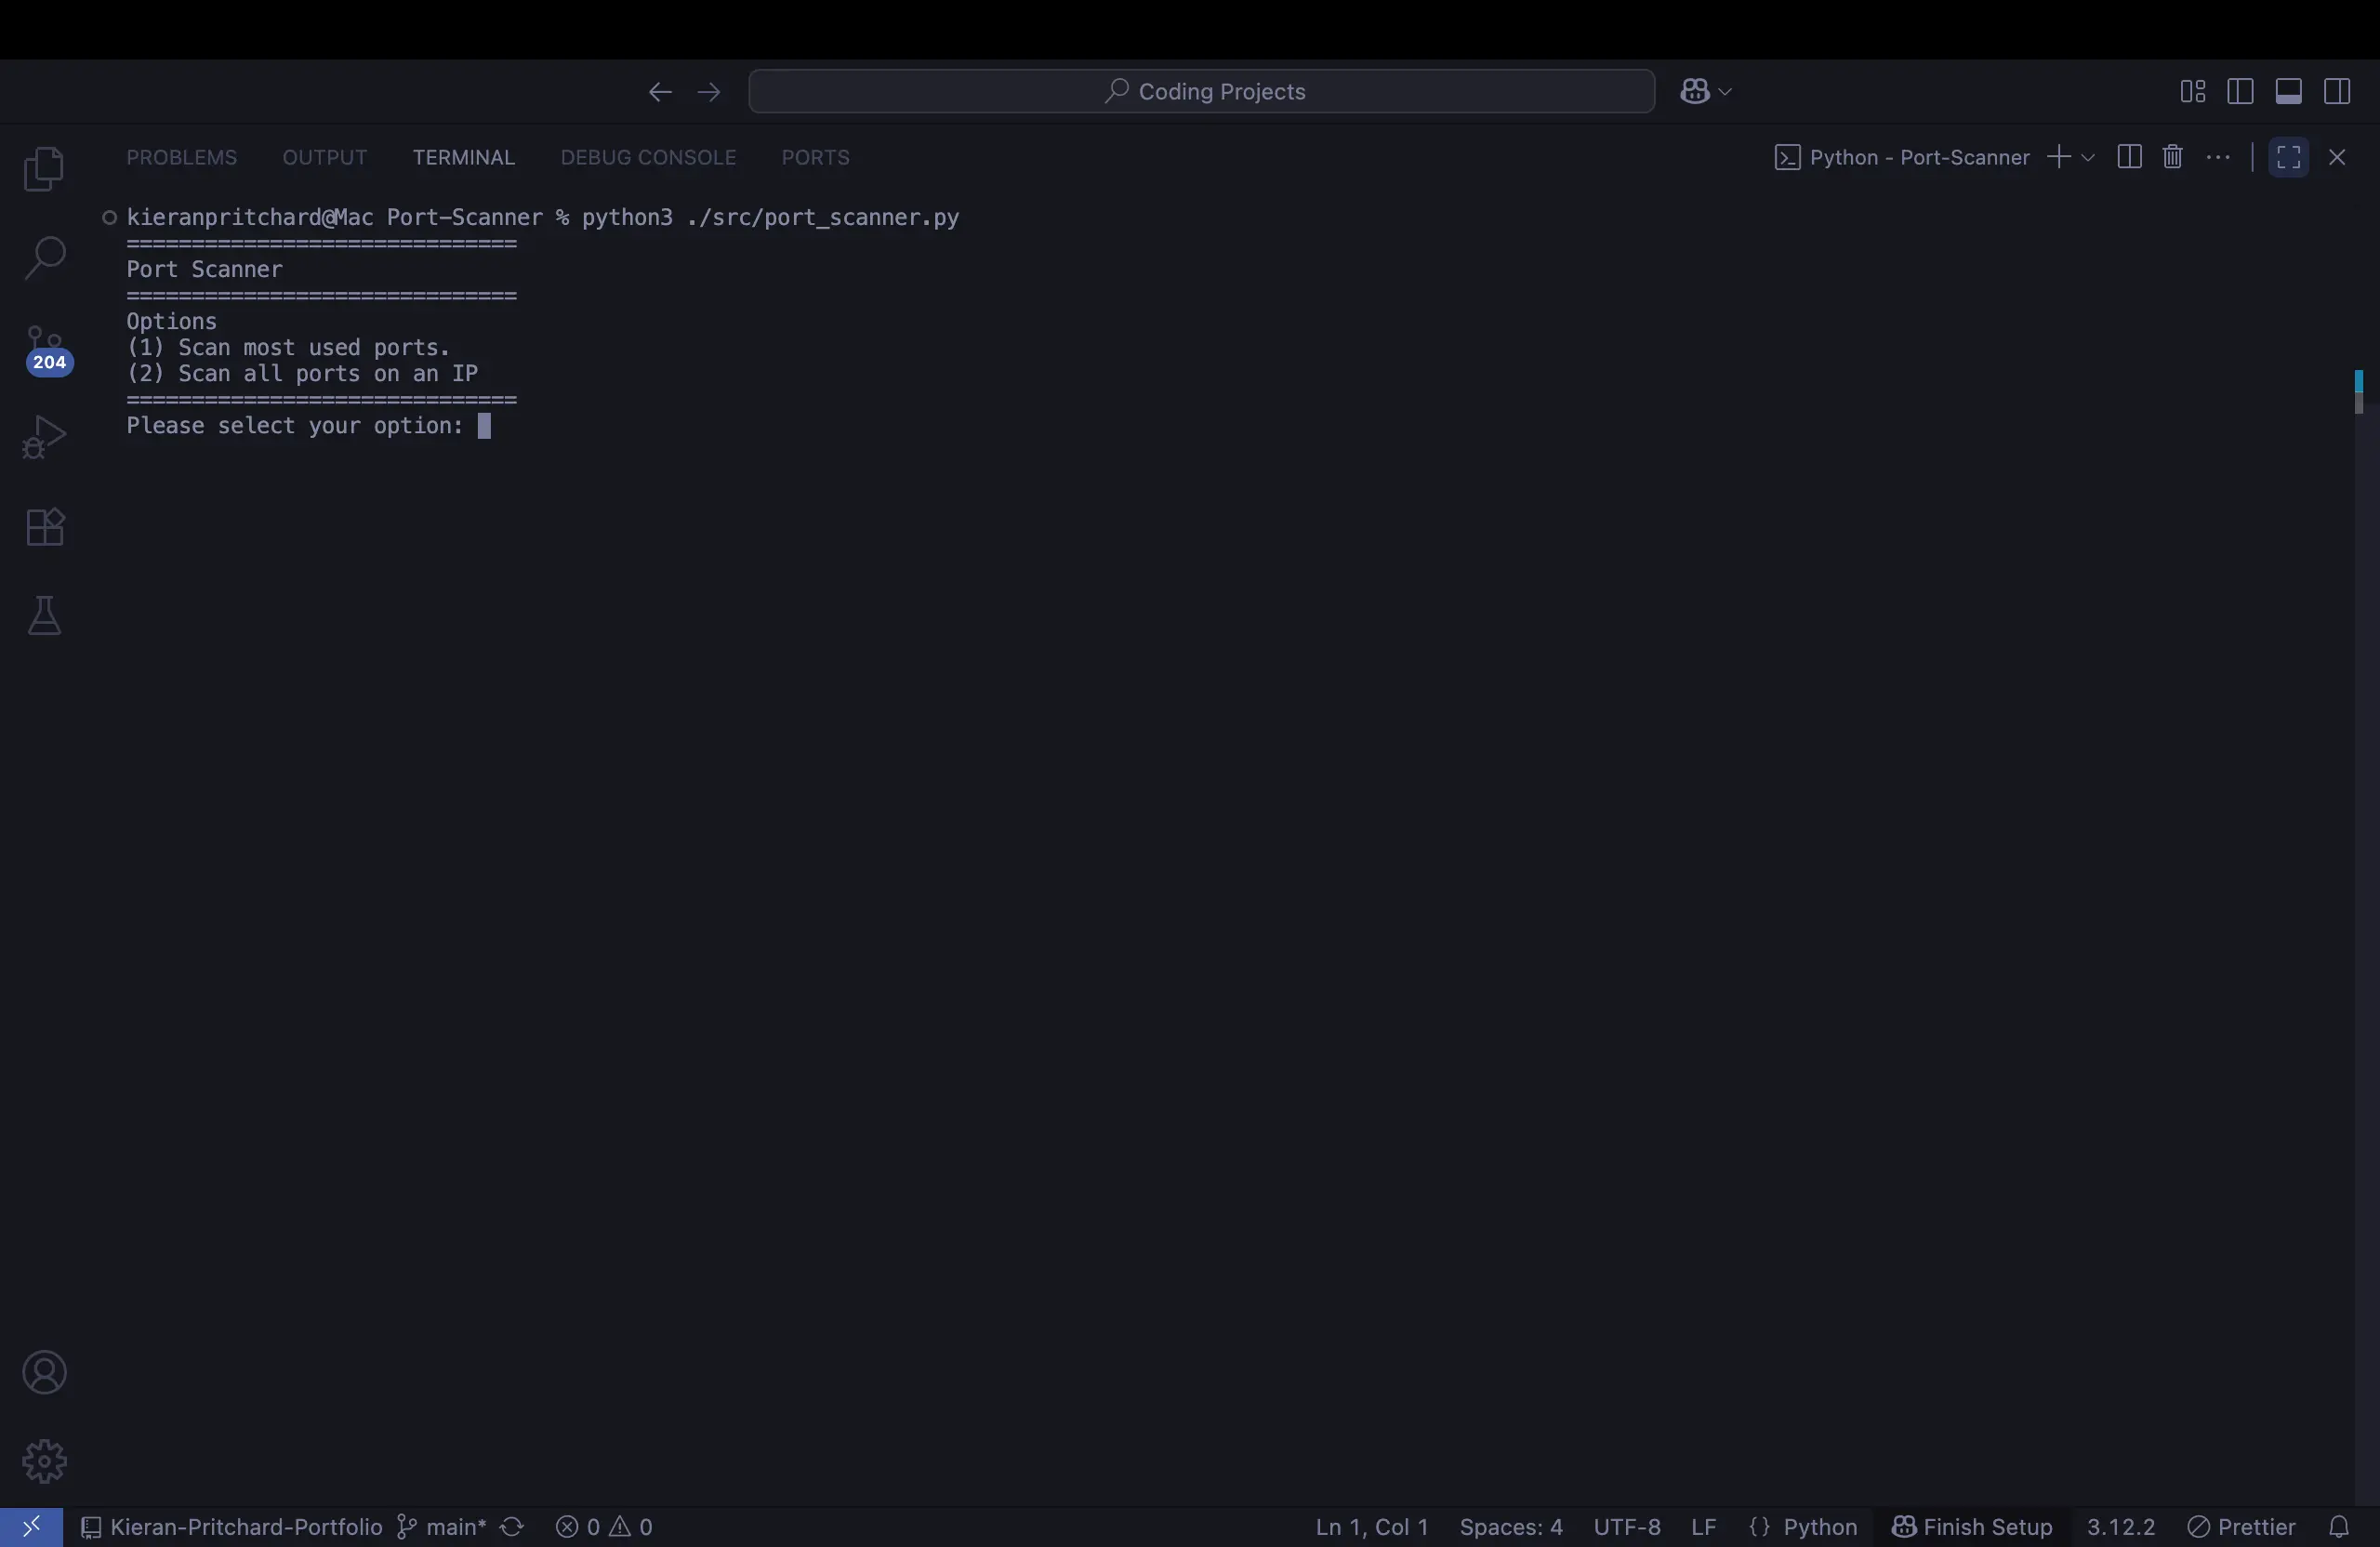
1. Starting the Program
Run the script from your terminal.
The program greets you with a menu and asks how you’d like to scan.
2. Choosing a Scan Type
Option 1: Scan the most commonly used ports (e.g., 21 for FTP, 22 for SSH, 80 for HTTP).
Option 2: Perform a full scan across ports 1–1024 for a deeper look at the target system.
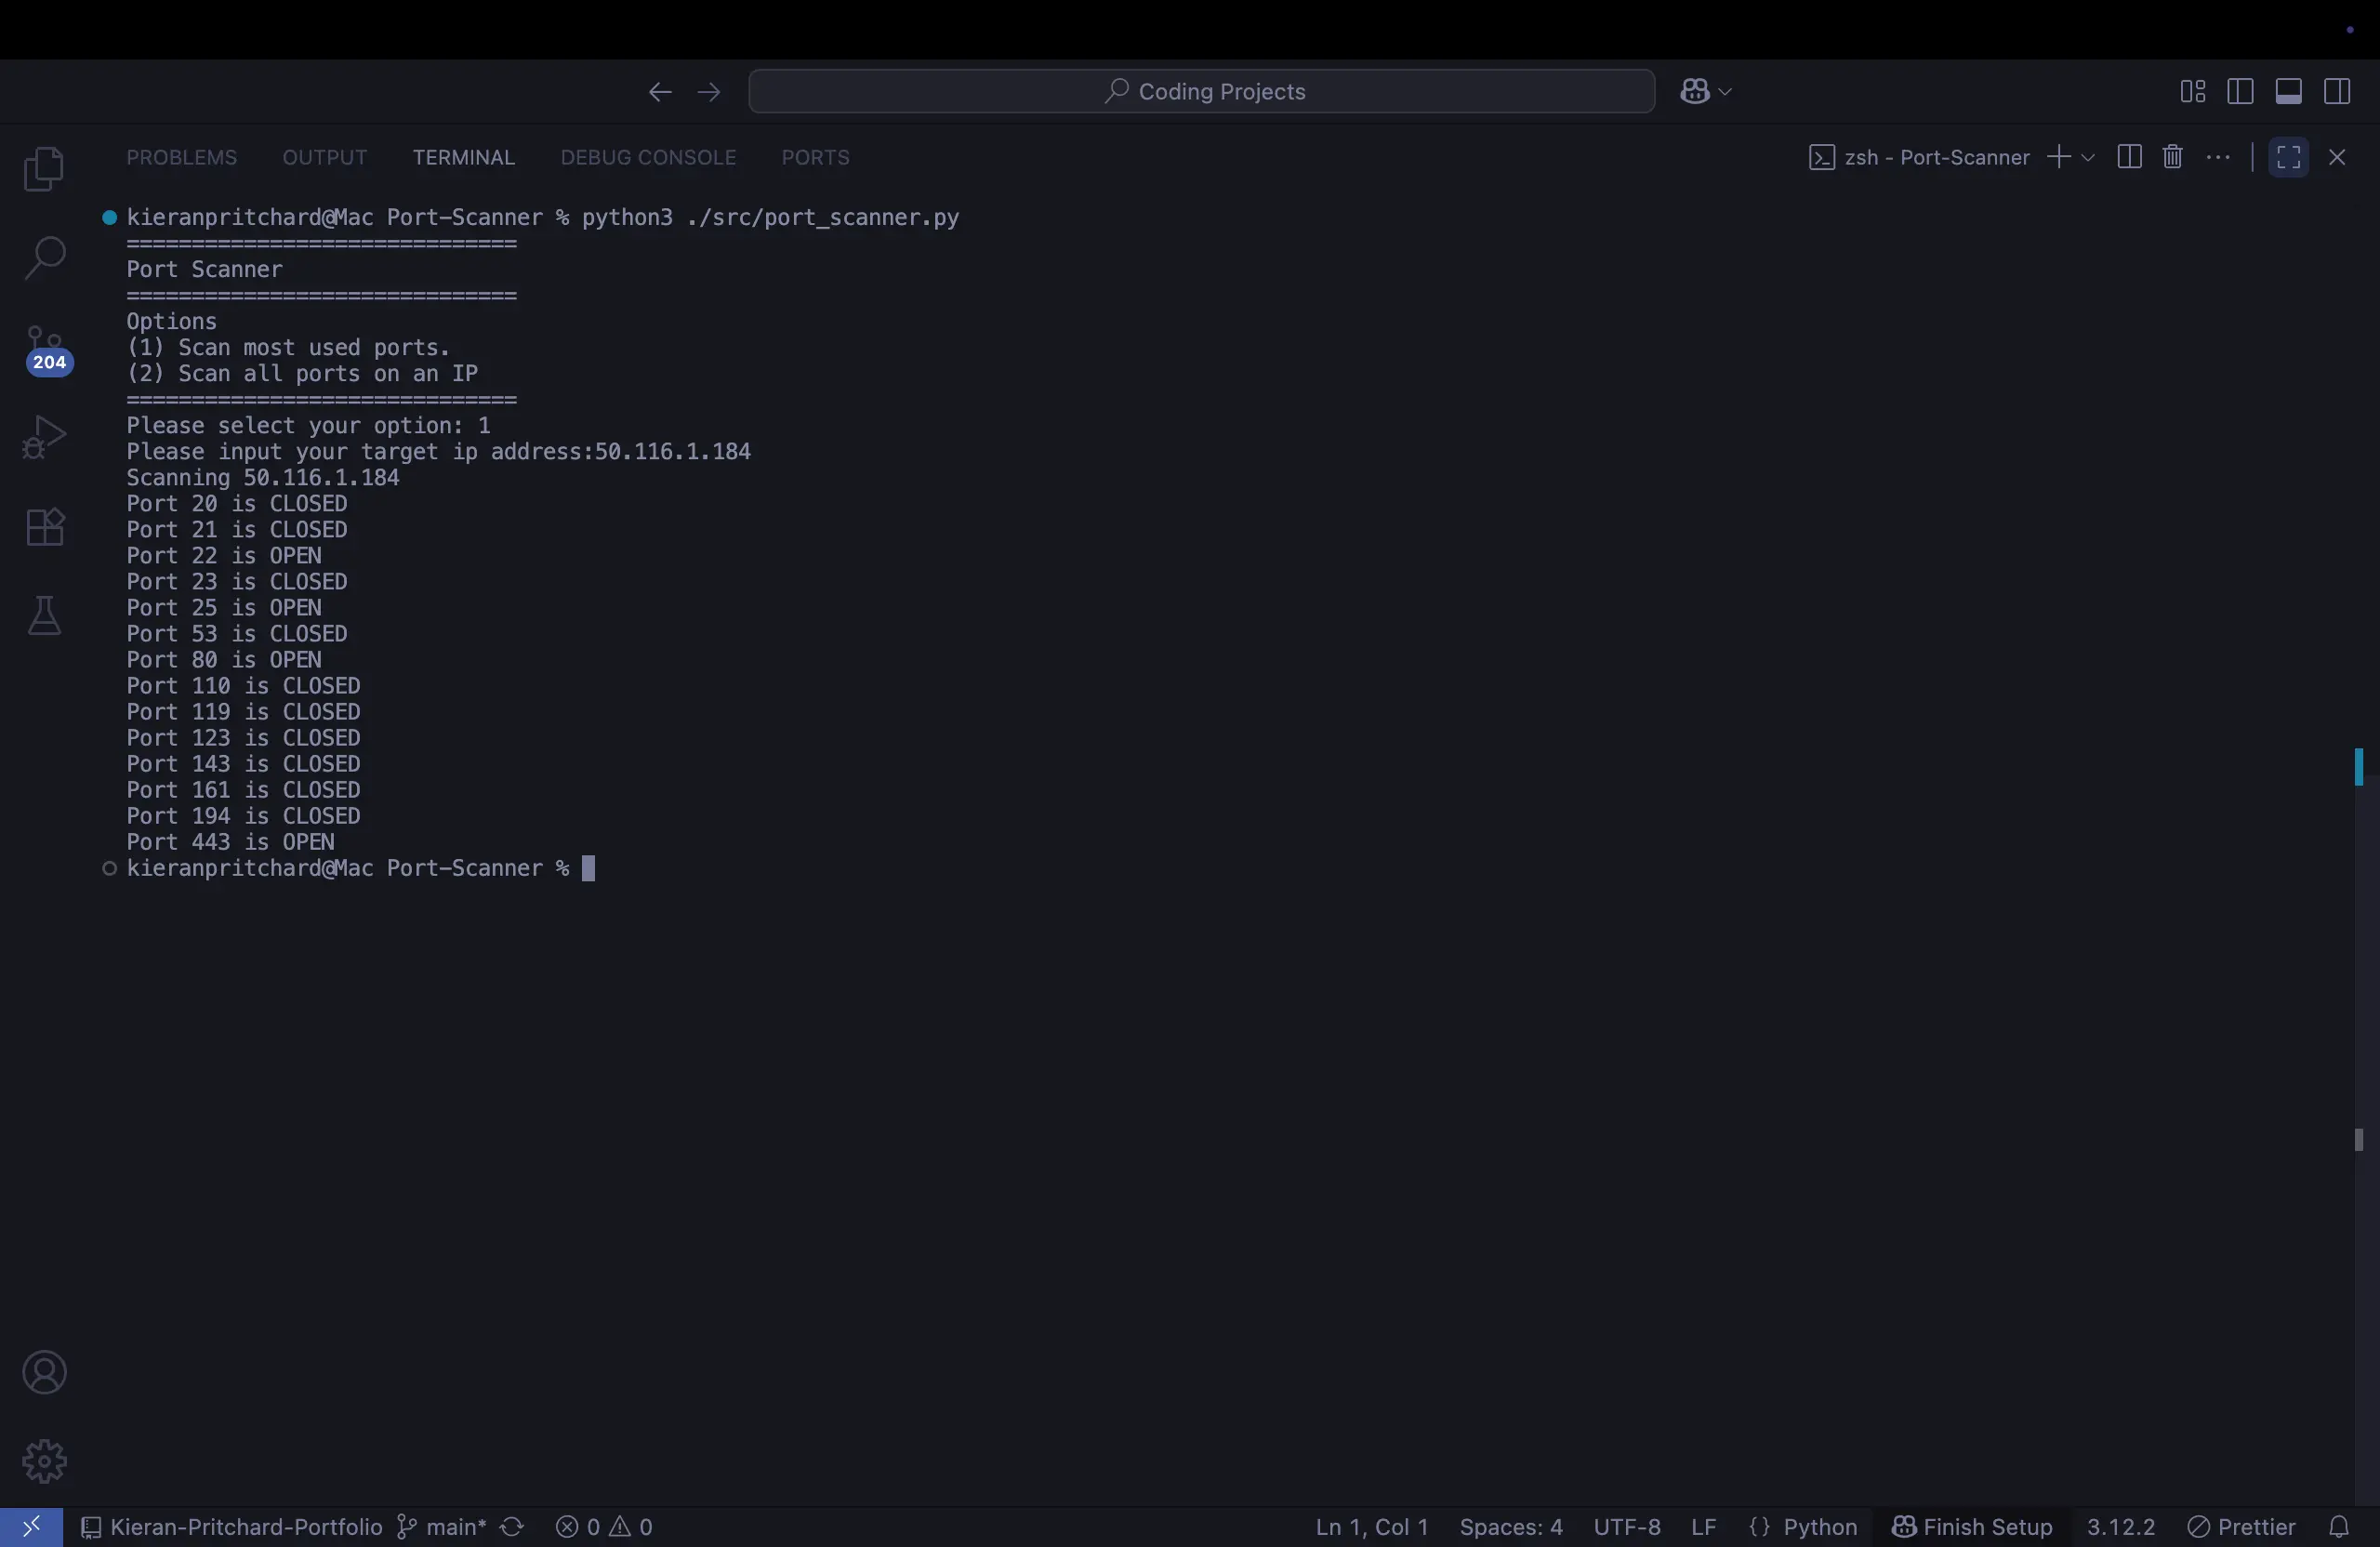
3. Entering the Target
You’ll be prompted to enter the target machine’s IP address (for example, 192.168.1.1).
The scanner then attempts to connect to each specified port on that IP.
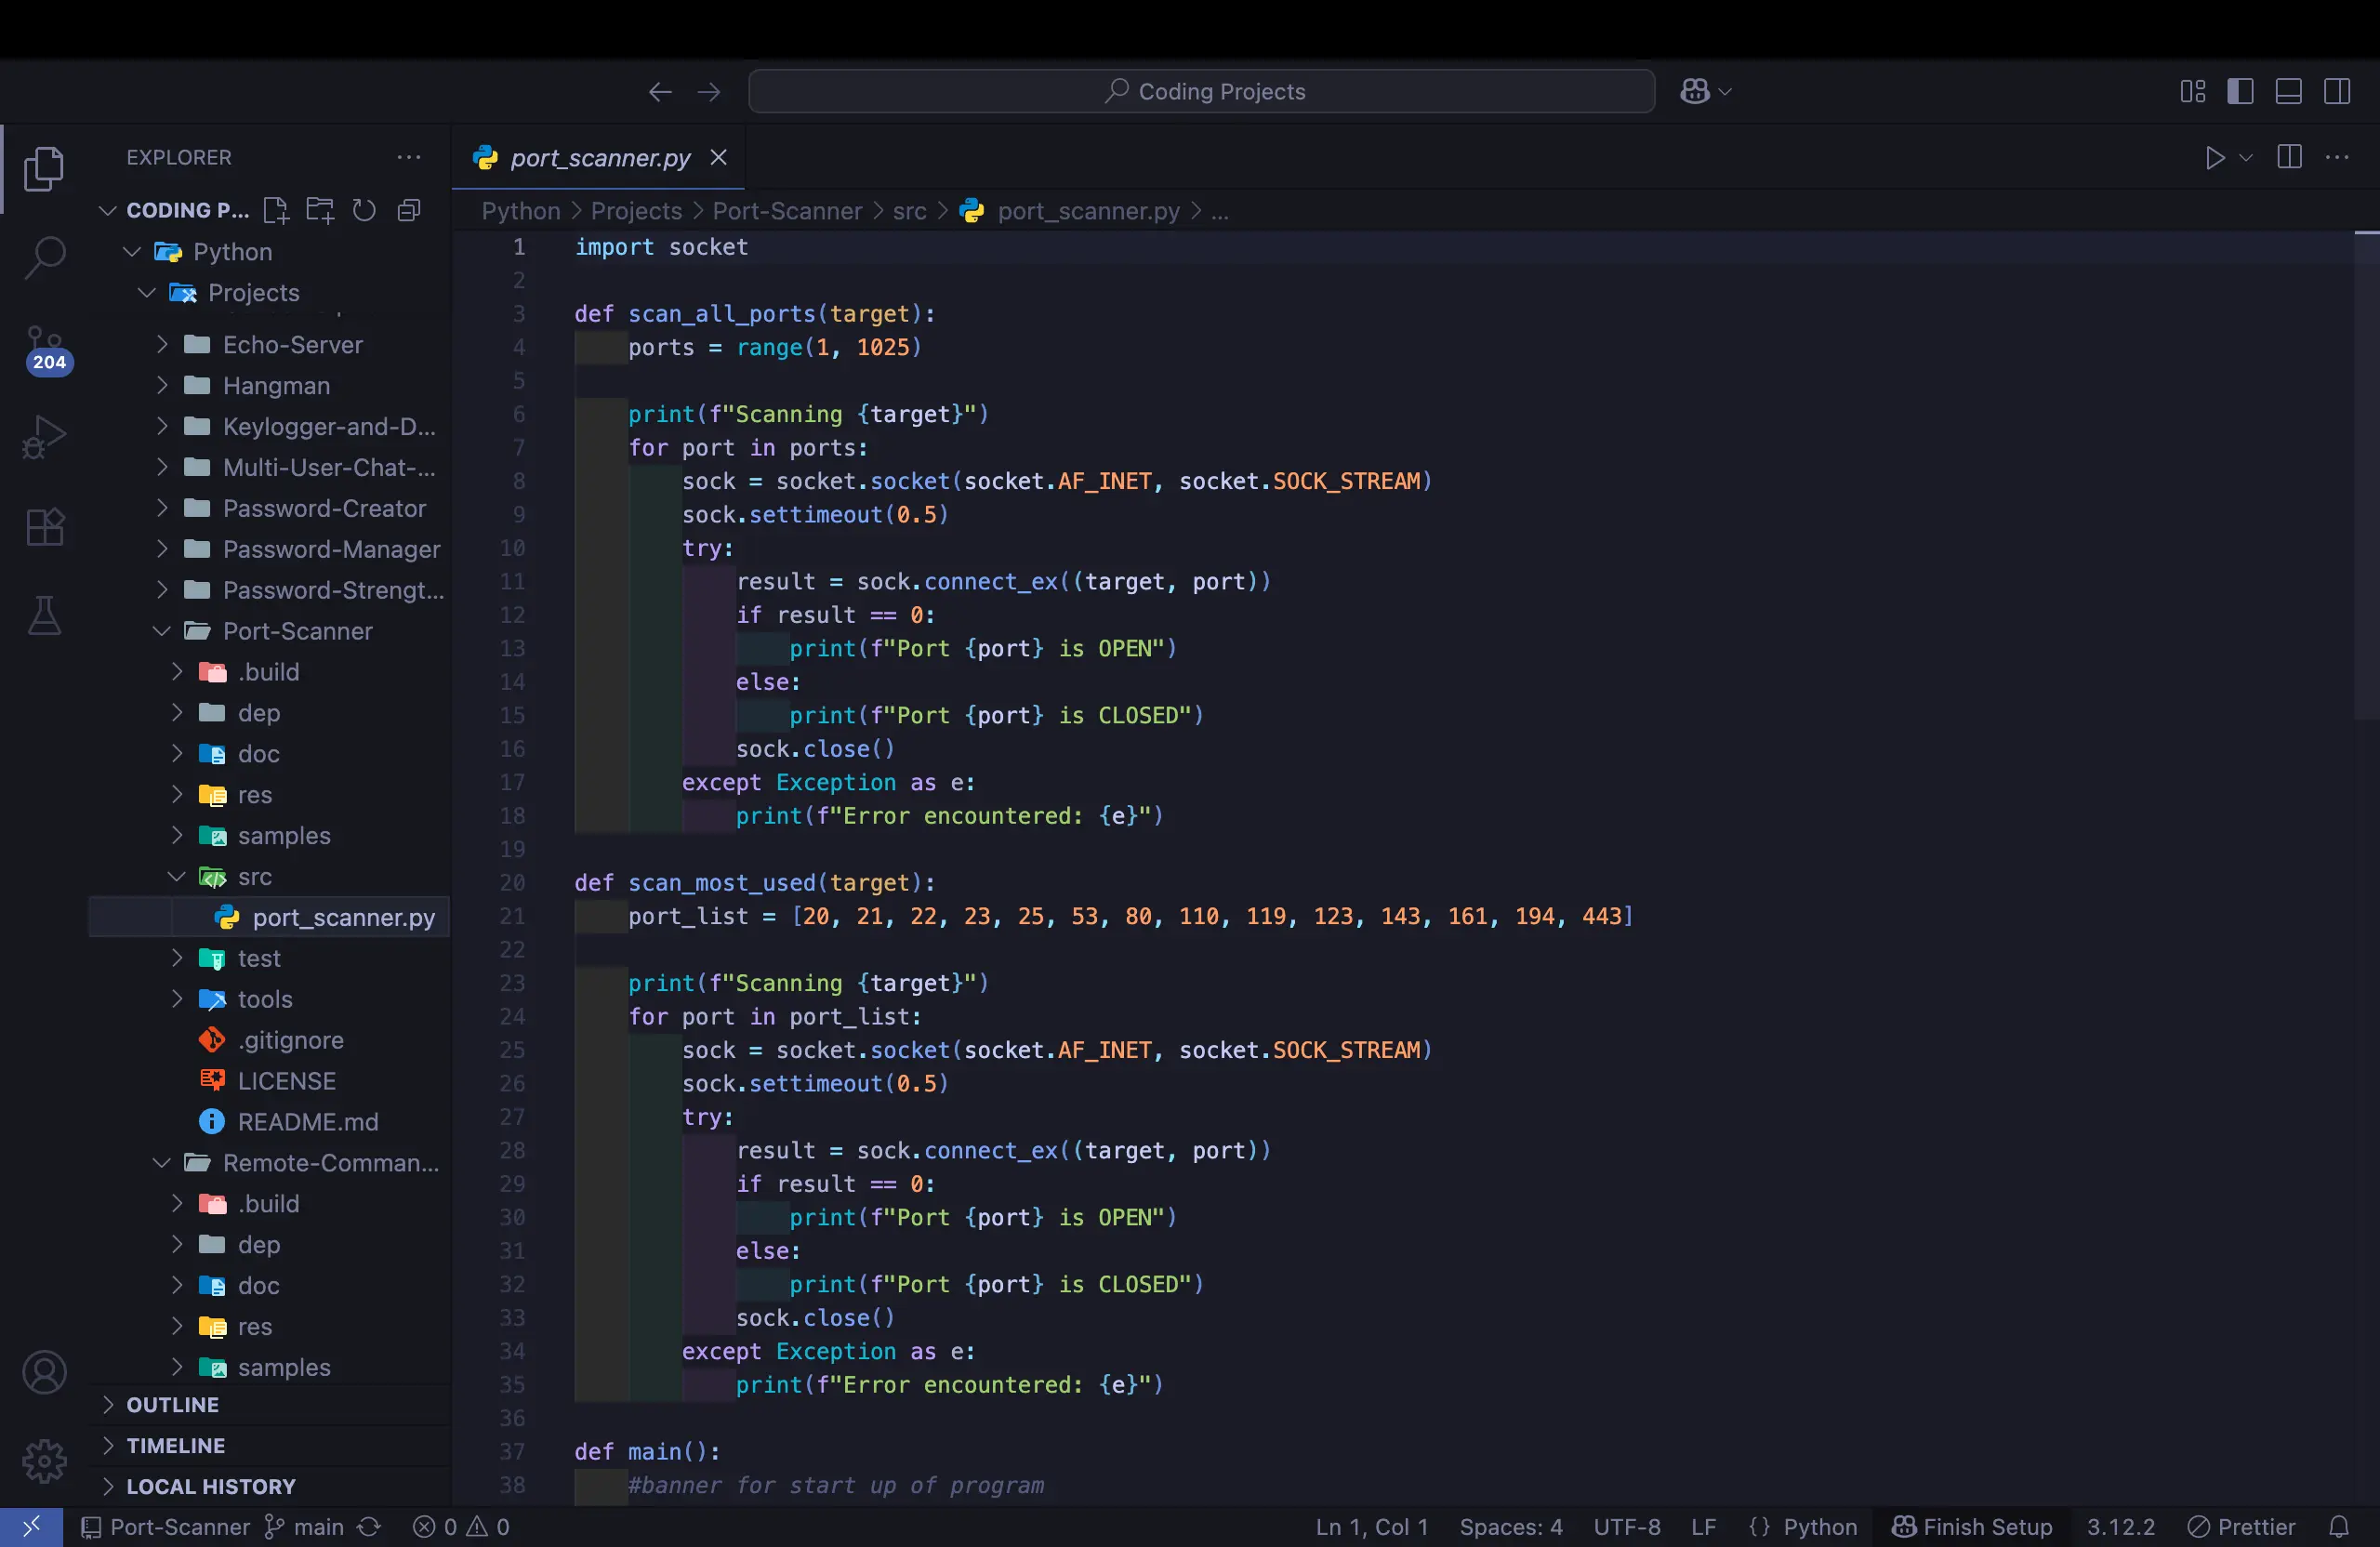
4. Behind the Scenes
Using Python’s socket module, the program tries to establish a connection on each port.
If the connection succeeds, the port is marked as OPEN. If it fails, the port is marked as CLOSED.
A timeout mechanism ensures the scan doesn’t stall on unresponsive ports.
5. Viewing the Results
Results are displayed in real time as the scan progresses.
You’ll quickly see which ports are available for communication and which are blocked.
6. Practical Takeaway
The scanner gives immediate insight into the network surface of the target.
It’s not meant to replace professional tools like Nmap but serves as a hands-on learning project that demonstrates how port scanning works under the hood.